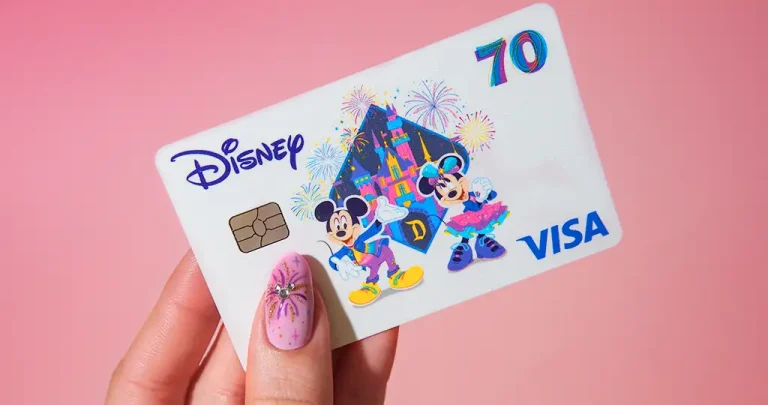
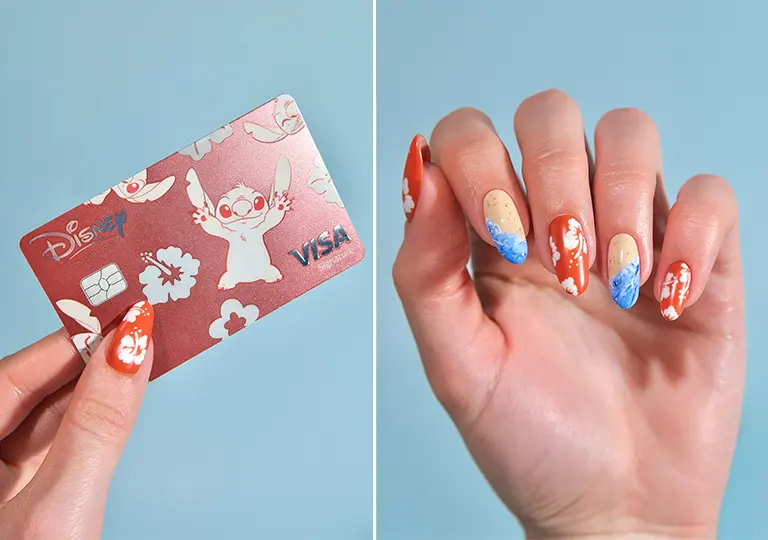
Your Disney style doesn’t stop at your outfit—in fact, it can start right at your fingertips! We’re sharing three fabulous new DIY Disney nail art designs to help you channel some of your favorite Disney® Inspire Visa® Card designs, perfect for your next visit to Disney Parks. Three unforgettable card designs are brought to life as Disney nails with bold colors, shimmering details and Character-inspired touches. There’s something for everyone here: a Stitch card design manicure channeling Hawaiian vibes, a colorful fiesta-inspired Coco card design set and even a classic and sparkly Mickey Mouse-adorned Icon card design nails option fit for any occasion.
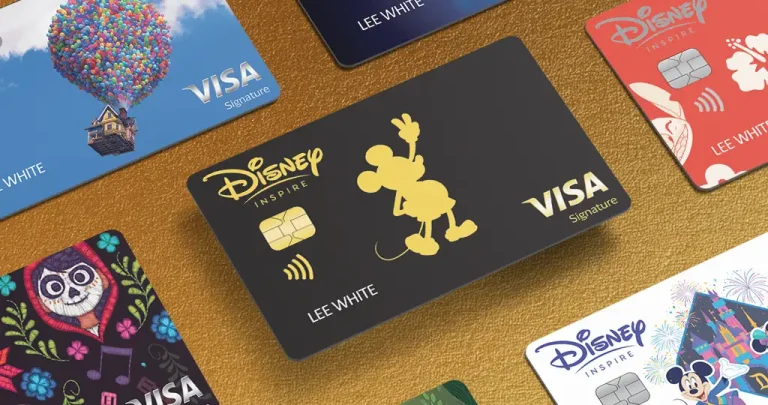
With our step-by-step instructions, your nails can match some of your favorite Disney Inspire Visa Card designs! And there’s even more inspiration to explore with all five card designs exclusively available to Disney® Inspire Visa® Cardmembers.Card designs
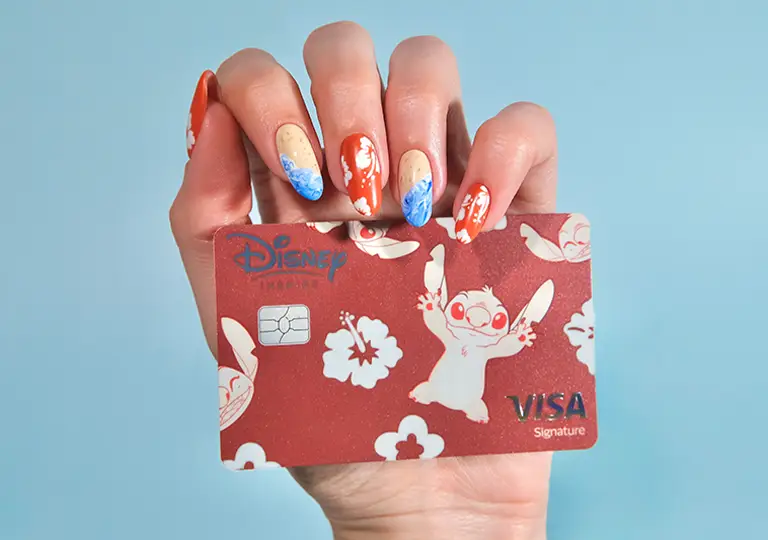
Stitch Nail Art Design
Cute, chaotic and simply impossible not to love, Stitch is the kind of Character who demands his own card design! Inspired by the serene setting of Lilo & Stitch, this nail look brings the playful island energy of the card design to your fingertips. So take out your tropical hues and get ready to paint some beachy accents. We’ve got a video covering all the essential steps, paired with written instructions below: everything Disney fans need to craft a manicure of pure personality.
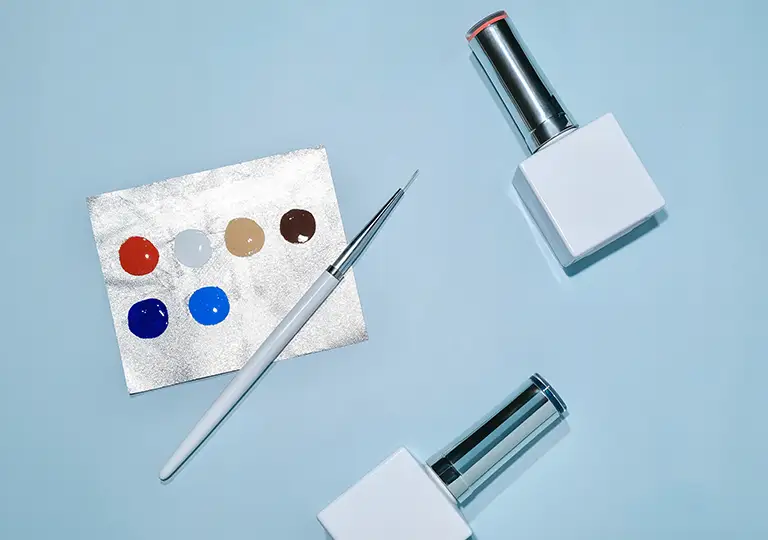
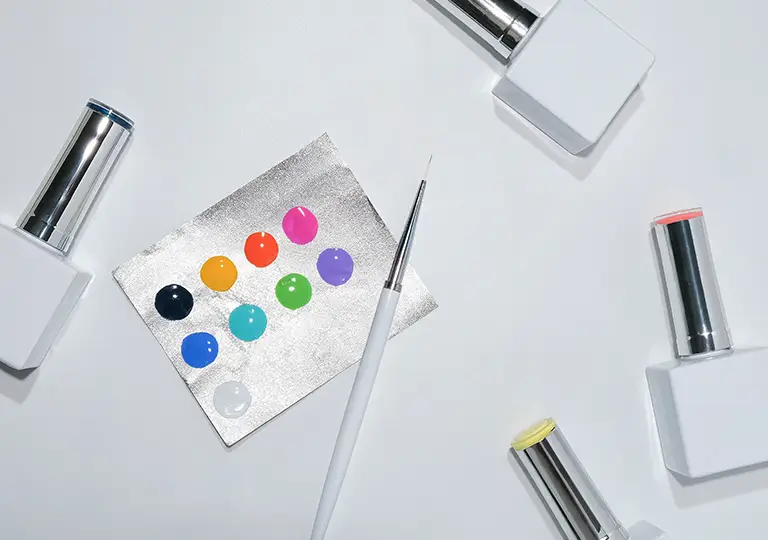
What You’ll Need
- Gel polish in the following colors/shades:
- Burnt Orange
- White
- Sandy Cream
- Light Brown
- Dark Blue
- Light Blue
- Thin nail art brush
- Gel glossy finish topcoat
- Optional:
- Matte finish topcoat
- Nail dotter tool(s) OR use the back of a nail brush (to create dots)
Step-By-Step Instructions
1. Prep and paint each nail in the base colors of burnt orange and sandy cream. Cure fully with a gel nail lamp before moving to the next step.
2. Using a nail dotter tool or the back of your nail art brush, dot on white polish to the burnt orange nails in a circular formation.
3. Using a thin nail art brush, drag out the dots into hibiscus petal shapes. Using the burnt orange shade, add color to the center of each flower and gently drag the polish outward to create delicate lines. Finish each flower with tiny dot details and a thin center stamen for added dimension.
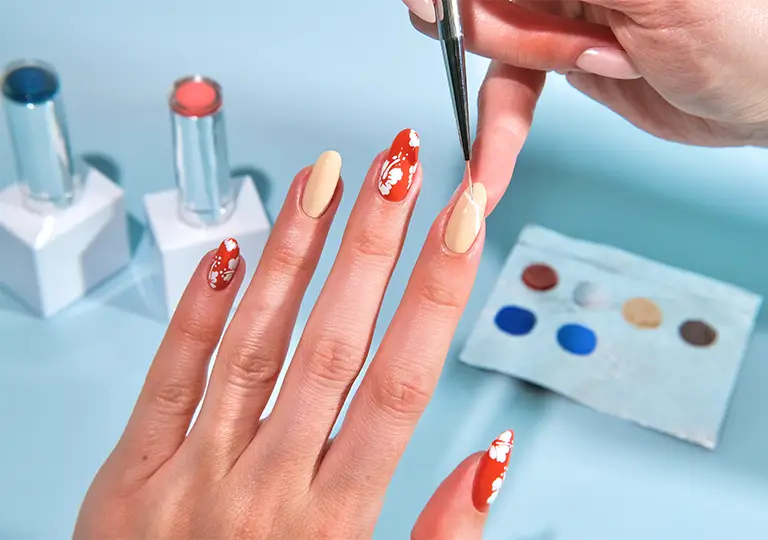
4. For the beachy nails, use a thin striper nail art brush to apply a white, wavy shoreline. Add swirling hues of dark blue and light blue polish that extend to the tip of the nail for a watery and dreamy wave effect.
5. Add specks of light brown to create a sandy effect, before curing and sealing your fresh new mani with the topcoat of your choice. You could use a glossy finish on the wave nails for added shine, and a matte finish on the flowers for a fun Hawaiian shirt-inspired effect over the hibiscus nails to mimic the Stitch card design. Or, go all glossy if that’s the look you prefer! Now say “aloha!” to your favorite new manicure and consider vacation mode officially “activated.”
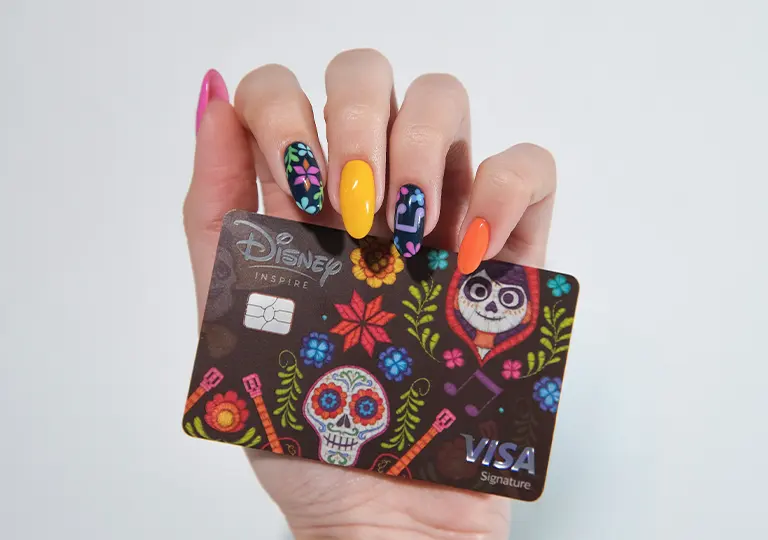
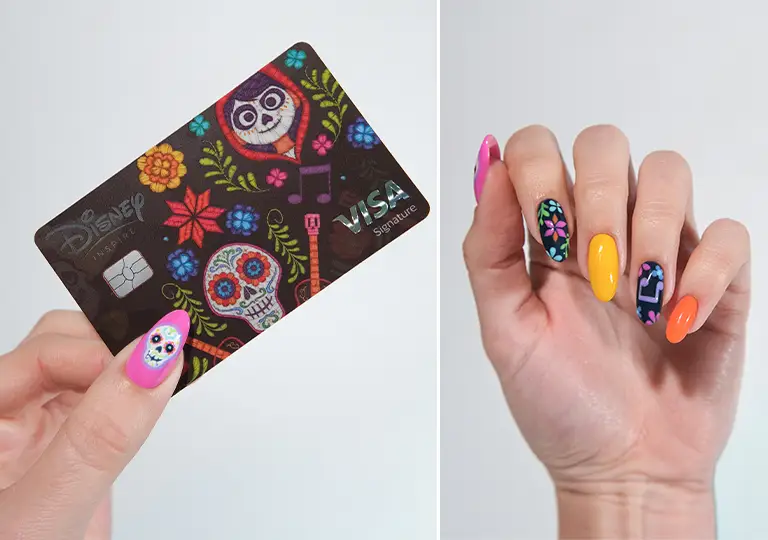
Coco Nail Art Design
We adore the card design inspired by Disney and Pixar’s Coco, and are thrilled to help Cardmembers bring this rich and colorful look to your nails! Bringing these intricate and floral touches to life may require a steady hand and some patience, but we’ve got you covered with a detailed DIY and a video showing off the process. Let’s get started!
What You’ll Need
- Gel polish in the following colors/shades:
- Dark Blue/Gray
- Bright Yellow
- Bright Orange
- Bright Pink
- Blue
- Teal
- Bright Green
- Purple
- White
- Gel glossy finish topcoat
- Thin nail art brush
- Optional: Nail dotter tool(s) OR use the back of a nail brush (to create dots)
Step-By-Step Instructions
1. Prep your nails before applying base colors of bright pink, yellow and orange as well as your dark blue or gray color to each nail accordingly. Cure your nails fully before moving onto the nail art.
2. Using the back of a nail brush, add a generous sized circle to start making your sugar skull motif. Make a smaller dot below it and connect the two using a nail art brush to define the skull shape. Once you’re satisfied, cure it before painting the design on top in the next step.
3. With a dotter tool and/or a nail brush, use your darkest color to apply the details of the sugar skull’s face, including a crosshatched smile. With your most colorful polishes, apply tiny dots and swirls for the decorative details before carefully outlining the design. Add simpler dot-like flowers and bright green vines to finish these nails. Take your time here—you can always wipe away and retry any details until you’re happy with the design!
4. To two of your darkest nails, add the floral designs using your brightest pink, orange and teal colors to form tiny diamond-shaped strokes radiating outward from the center.
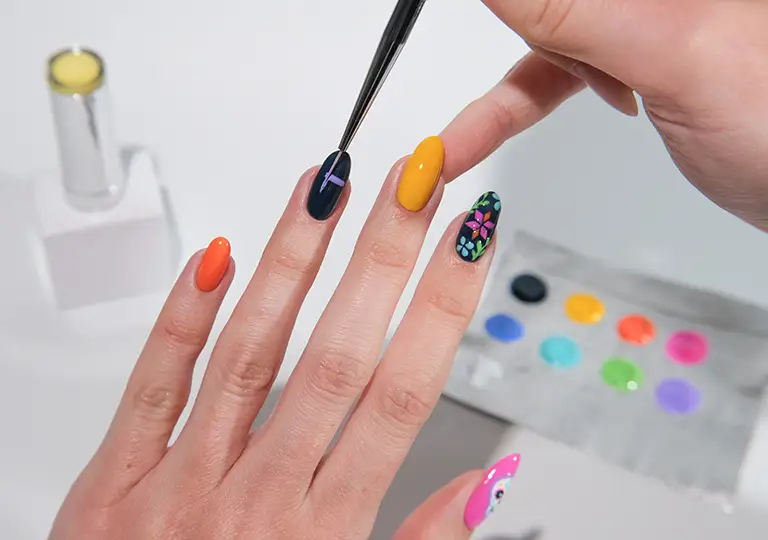
5. To the remaining dark nails, use a striper brush to create the steady lines of a musical note, and finish it with two well-placed dots. Fill any remaining space with colorful flowers by placing small dots of polish and dragging them outward to create petals.
6. Consider your nail game officially in full bloom—now just cure and seal your manicure with a glossy topcoat!
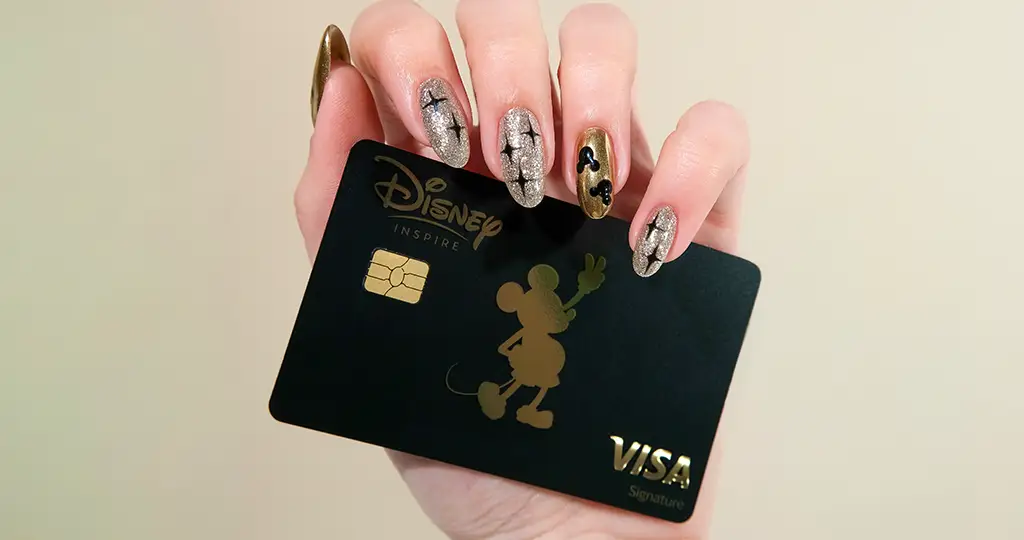
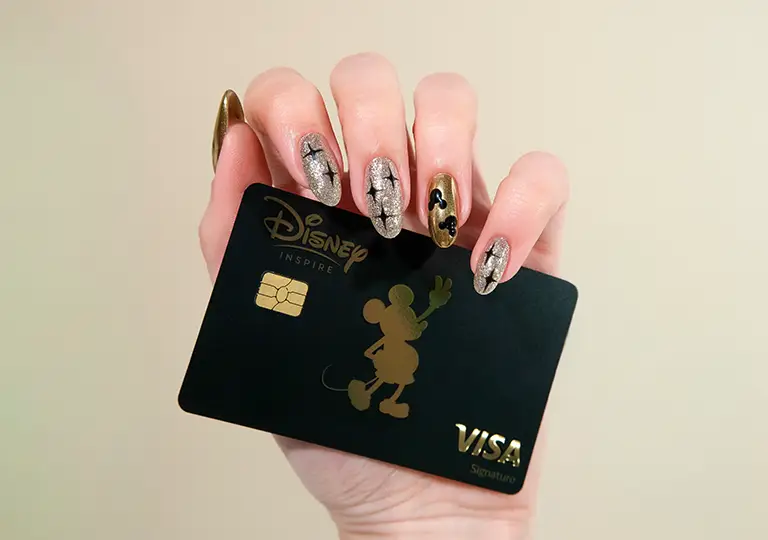
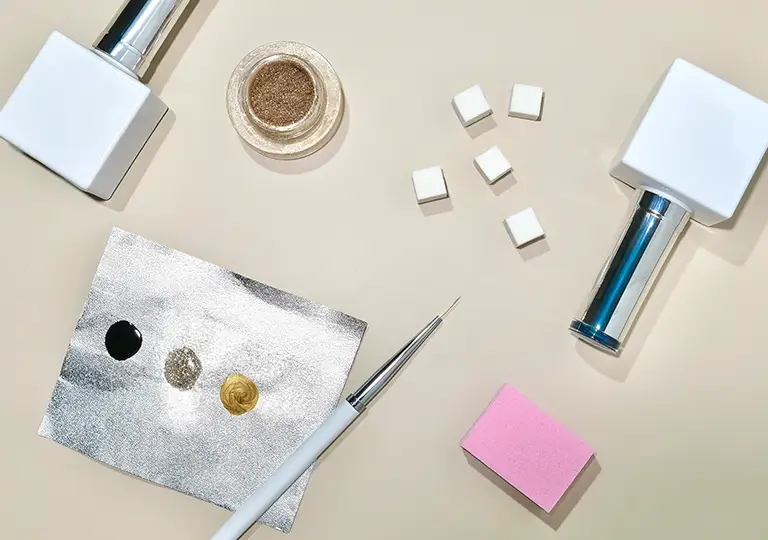
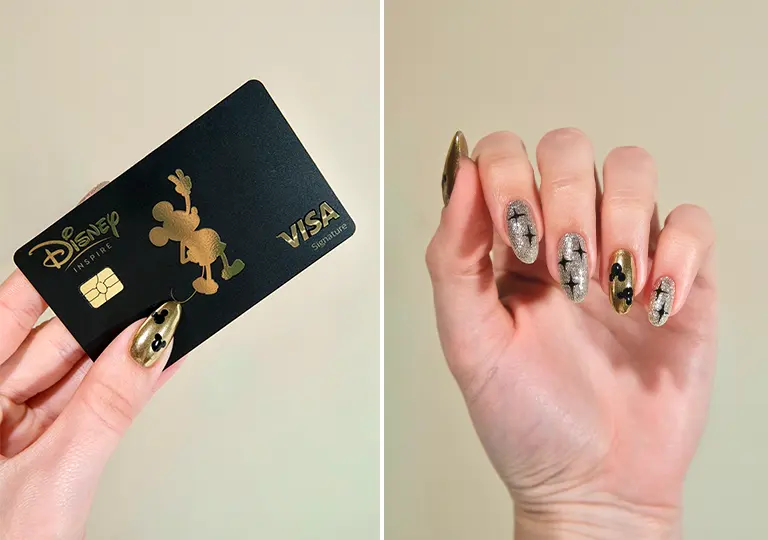
Icon Nail Art Design
Classic and instantly recognizable, this Mickey Mouse manicure is inspired by the Icon card design. It pairs shimmering base colors with sharp black accents for a look that feels both timeless and elevated. But it’s still got that unmistakable Disney charm perfect for everything from Park days to dinner reservations. Follow along with our instructions below and check out the video if you need guidance for recreating this luxe, Mickey Mouse nail art design.
What You’ll Need
- Gel polish in the following colors/shades:
- Black
- Glittery Silver/Gold
- Metallic Gold
- Gold Chrome Powder
- Thin nail brush
- Sponge
- Nail buffing block
- Gel glossy finish topcoat
- Optional: Nail dotter tool(s) OR use the back of a nail brush (to create dots)
Step-By-Step Instructions
1. Prep and paint each nail the base colors of metallic gold and glittery silver (or gold). Cure nails fully under your lamp.
2. Using a sponge, apply gold chrome powder to each gold-colored nail.
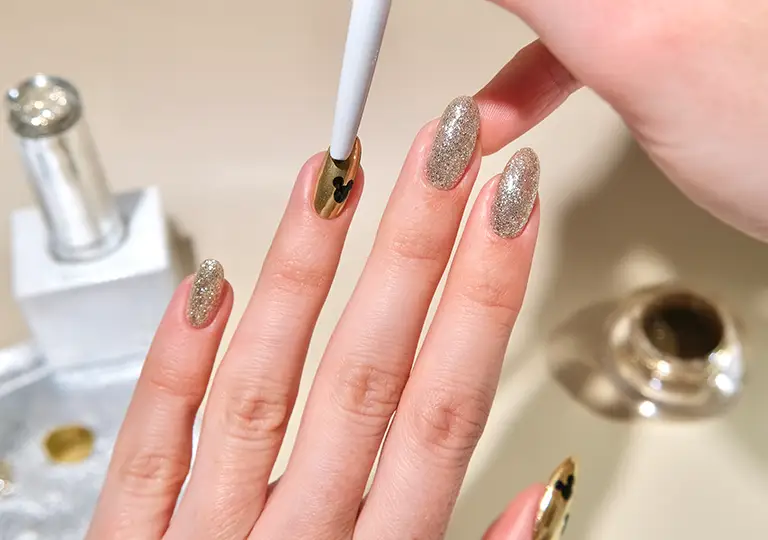
3. With your nail dotter tool or the back of a nail art brush, add your black Mickey Mouse designs to the gold nail. It’s easy: just one big dot paired with two smaller ones! Using less polish will help keep the smaller circles neat and even.
4. For the glittery nails, use a nail buffing block to smooth your surface. Then, delicately paint alternating sparkles in bold, black polish on each one. Start by painting tiny black dots onto the nail. Then, using a thin liner brush, gently drag each dot outward into four points to create the sparkling stars.
5. This look deserves the VIP treatment, so seal all that shimmer with a glossy topcoat and cure well to lock it all into place! You’ve got a manicure that’s simple, sleek and instantly iconic.
Now that your nails are serving Disney style with every flick of your wrist (or flash of your Disney Inspire Visa Card), it’s time to put those digits to use! Click on over to see all five exclusive Disney Inspire Visa Card designs if you haven’t yet.Card designs And if you’re having trouble picking just one? Take the Quiz: Which Disney® Visa® Credit Card Design Should You Choose? to find your ideal match.