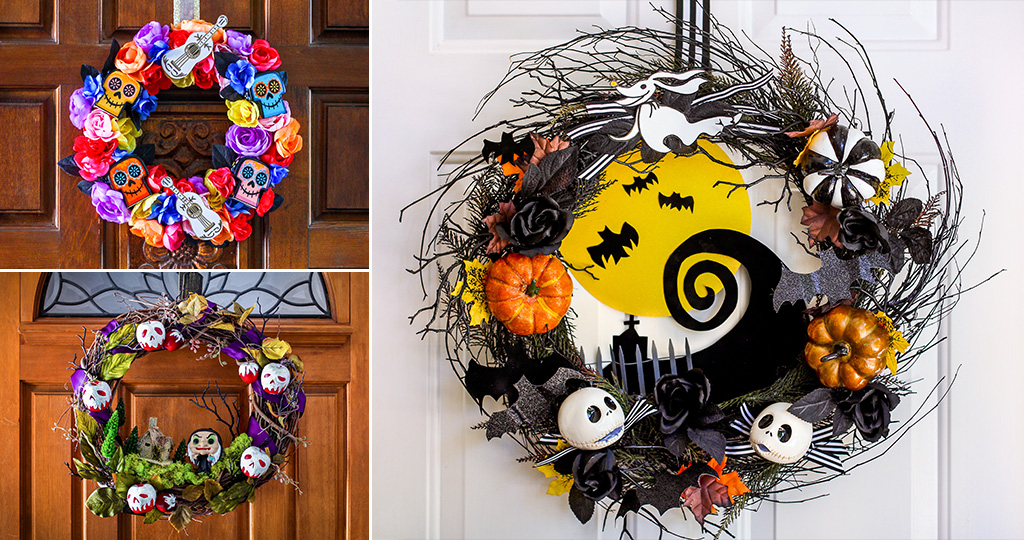
Before the leaves start a-falling and ghosts start a-knocking, give your door a dose of Disney with wreaths inspired by Jack Skellington’s ghoulish gang, Coco‘s vibrant skulls, and Snow White‘s wicked queen. From particolored portals to gloomy gateways, these clever designs will help you craft the perfect Halloween entrance in just four easy steps.
Note: Because of their popularity, some items shown in the images might be unavailable, but get your hands on plenty of other options at Disney store, shopDisney.com or the craft store when picking up other material for our spooky wreaths.
How to Make a Nightmare Before Christmas Wreath
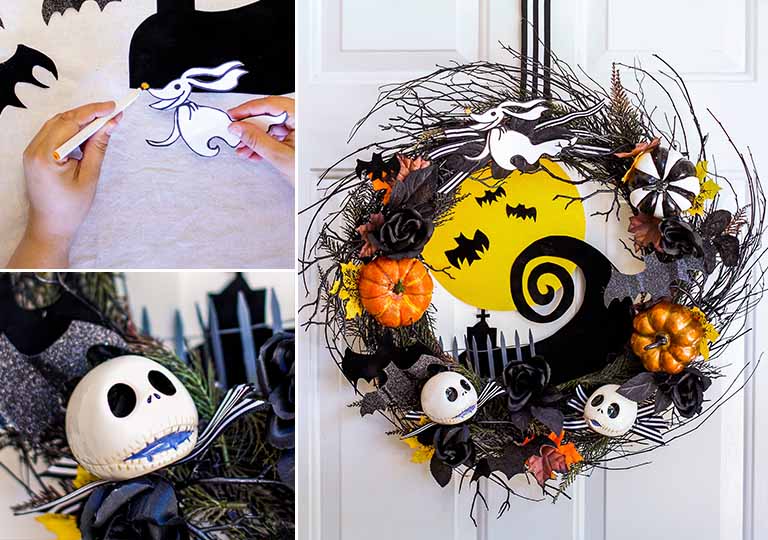
This is Halloween! And who better to bedeck your door than the Pumpkin King himself (and his loyal pooch Zero)? Some paper cutouts and a couple of nifty salt and pepper shakers from Disney store will scare up plenty of personality.
What You’ll Need
- Black twig wreath (spray paint if necessary)
- Floral wire
- Wire cutters
- Craft adhesive
- Hot glue gun
- Foliage (black branches, autumn leaves, black roses)
- Jack Skellington figures
- Black and white ribbon (thick and thin)
- Ornamental pumpkins
- Miniature fence (buy from craft store or use our template)
- Black, white and grey cardstock
- Templates (click here to download and print)
Directions
- Using a black twig wreath as a base, place the moon and hill behind the center using hot glue. On the front, adhere branches, leaves, mini pumpkins, roses and remaining bats. (Hint: try folding the wings of the bats for an even spookier effect.) Then, tuck a mini fence in front of the hill.
- Attach shakers by threading floral wire through the stopper holes and wrapping onto the wreath. Glue black and white ribbon pieces to the backs of shakers to create Jack’s collar.
- Print the provided templates and trace onto the cardstock. Attach the hill and a few smaller bats to the moon with strong craft adhesive.
- Top it off with our hero, Zero (don’t forget to color in his nose!) and hang with a large black and white ribbon.
How to Make a Poison Apple Witch Wreath
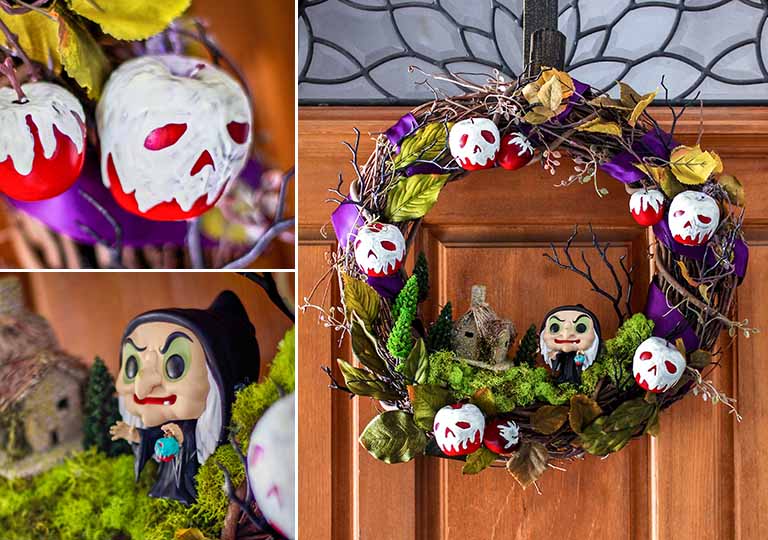
A perfect disguise! An adorable Funko Pop! Witch Figure decorates this wreath with delicious apples… never mind the fresh dripping coat of glow-in-the-dark “poison.”
What You’ll Need
- Grapevine wreath
- Witch Figure
- Purple ribbon
- Hot glue gun
- Artificial leaves and branches
- Artificial moss
- Miniature house (from craft or hobby store)
- 5-7 artificial apples
- White puffy paint
- Glow-in-the-dark puffy paint
- Wire cutters
Directions
- Draw skull-shaped “poison” on the apples with white puffy paint and allow to dry. Follow with a second coat of glow-in-the-dark puffy paint and allow to dry.
- Using a grapevine wreath as a base, adhere moss, a miniature house, and the witch figure to the center of the wreath with hot glue.
- Wrap the wreath with purple ribbon, weaving in artificial branches and leaves. Secure with hot glue.
- Finally, secure the “poison apples” to the wreath using hot glue.
How to Make a Coco Day of the Dead Wreath
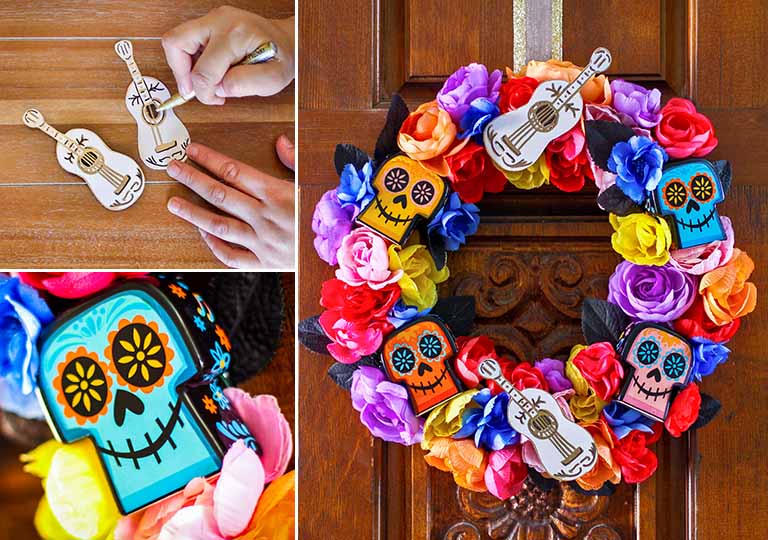
This wreath puts the life in afterlife, bursting with colorful flowers, gilded guitars, and candy-skull-inspired accessories. When a door screams fiesta this loud, no trick-or-treater can pass it by.
What You’ll Need
- Small wire wreath
- Assorted multi-colored artificial flowers
- Hot glue gun
- 2 sets of Coco figures
- Black floral leaves
- Floral wire
- Wire cutters
- Craft adhesive
- Gold metallic marker
- Ribbon (for hanging)
- White cardstock
- Guitar templates (click here to download and print)
Directions
- Print guitar templates; trace strings and guitar ornamentation with a gold metallic marker.
- Using a small wire wreath as a base, attach the figures by threading floral wire through the top and stopper holes, then wrapping around the wreath.
- Hot glue black leaves and multi-colored flowers onto the wreath frame, covering it completely.
- Attach paper guitars to the top and bottom of the wreath with craft adhesive.
Whichever festive wreath you decide to hang on your door this Halloween, Disney store and shopDisney.com have everything you need to get inspired and accessorized! And here’s a trick that’s also a pretty fantastic treat: Disney® Visa® Cardmembers save 10% on select purchases.1 That’s sweet savings, and you know what that means? More candy!
