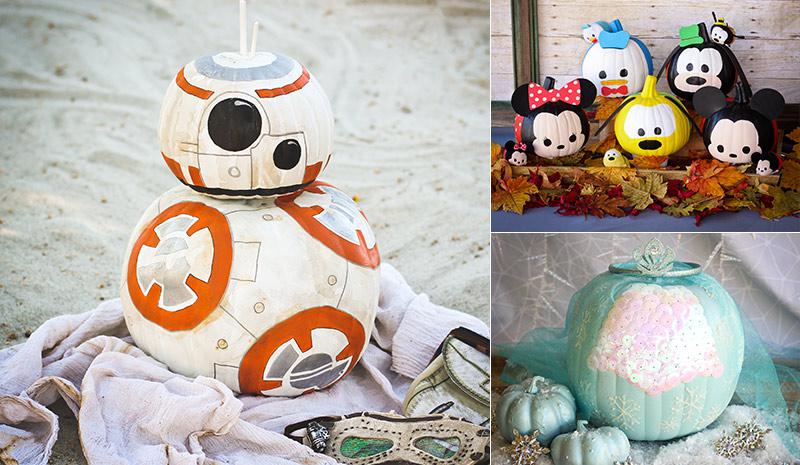
Nothing captures the spirit of Halloween more than carving up a few pumpkins, but why settle for a simple Jack-o-lantern when you can have the coolest gourds on the block? Here you’ll find some kid-friendly designs that are light on carving and heavy on personality. Take inspiration from a sweet stack of Mickey Mouse and his pals, a glittery Frozen masterpiece and an adorable Star Wars BB-8 droid.
8-Step BB-8 Pumpkin DIY
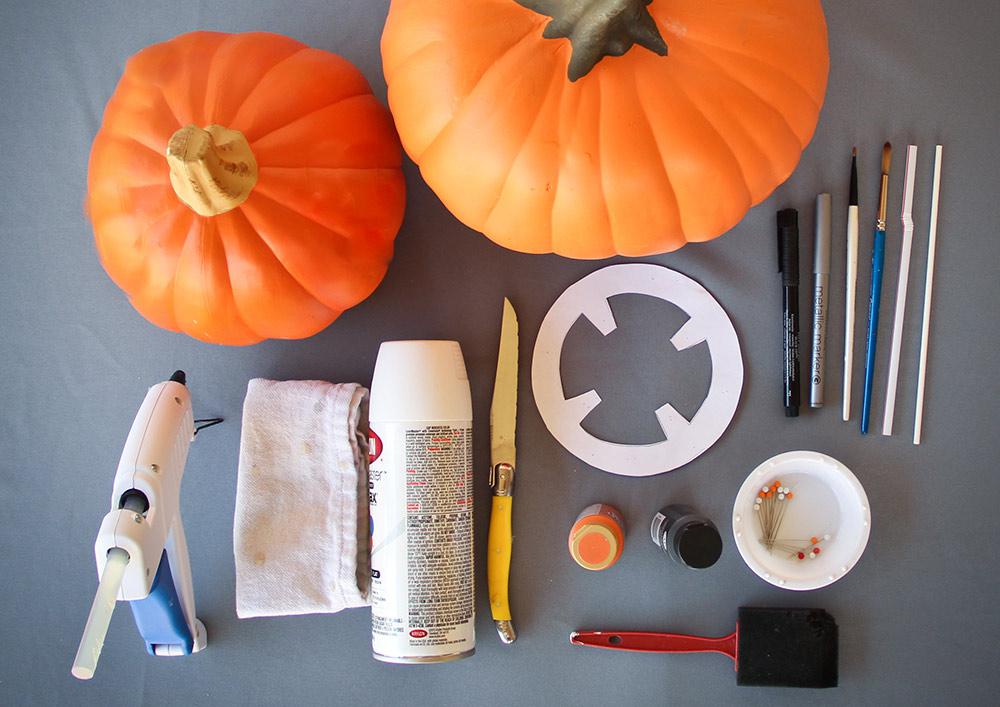
Supplies:
- 1 medium and 1 small pumpkin (to reuse him next year, use artificial pumpkins)
- Provided pattern (click here to download and print)
- Knife
- Matte white spray paint
- Pins
- Fine-tipped black marker
- Black gloss craft paint
- Orange craft paint
- Metallic silver pen
- 2 straws
- Glue gun
- Several skewers (if using real pumpkins)
- ½ cup water
- Sponge/cloth

Step 1
Cut stems off the pumpkins. Spray stems and two straws with matte white paint. Allow to dry.

Step 2
Print out and trace body pattern onto medium pumpkin: Pin the pattern to the medium pumpkin and trace with a thin black marker. Repeat this several times around the pumpkin, 2-3” apart.
![]()

Step 3
Add paint details to body: Paint the inside of each circle orange on the medium pumpkin. Fill the centers with the detailed design patterns provided using a metallic silver pen. Set aside.
![]()

Step 4
Use gloss paint on smaller pumpkin: For the smaller “head” pumpkin, paint a large, glossy, black eye in the center and a smaller circle below the eye, for the scope.
![]()

Step 5
Draw the three colored bands on BB-8’s “head”: Add two upper bands – one with the silver marker and one with orange paint (leaving room around the eye), and a lower band with black paint. Add a few orange rectangles along the lower, black band.
![]()

Step 6
Now, fill in the details! For the “body”, use a silver pen to connect the orange painted circles with thin lines, then add a few rectangles and small circles. On the “head”, outline around the eye and scope.
![]()

Step 7
Assemble pumpkins: Join BB-8’s “head” and “body” with skewers if using real pumpkins or hot glue for artificial ones. Glue on BB-8’s straw antennas.
![]()

Step 8 (Optional)
Once it’s completely dry, add weathered look: Mix a ½ cup of water with a drop of black paint and a drop of orange paint to create a wash. Apply lightly with a sponge and wipe clean with a cloth to give BB-8 a weathered look straight from Jakku.
![]()
Bonus How-Tos
DIY Mickey Mouse and Friends Pumpkins
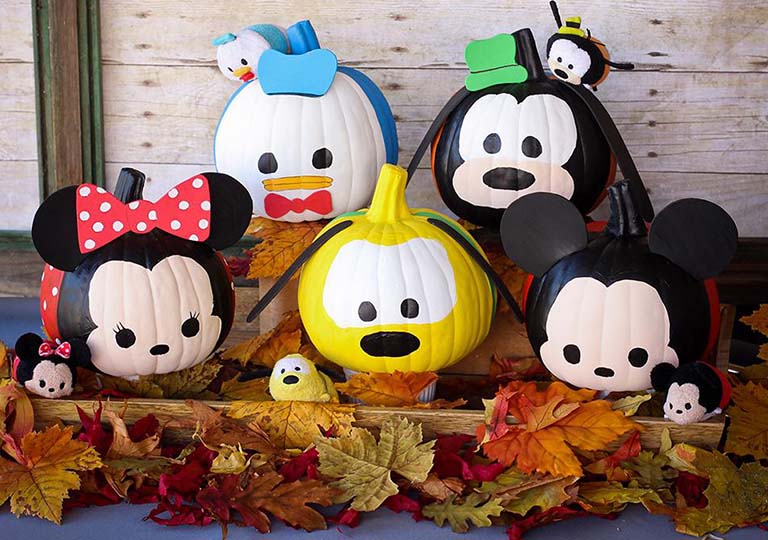
Why stop at one when you can have a bunch? Creating your own fab five is as easy as painting face outlines, then adding adorable eyes, noses, foam ears and accessories. Use Donald Duck, Goofy, Minnie Mouse, Pluto and Mickey Mouse for inspiration — and in no time flat you’ll be ready to stack, stack, stack!
![]()
Elsa’s Frozen Pumpkin DIY
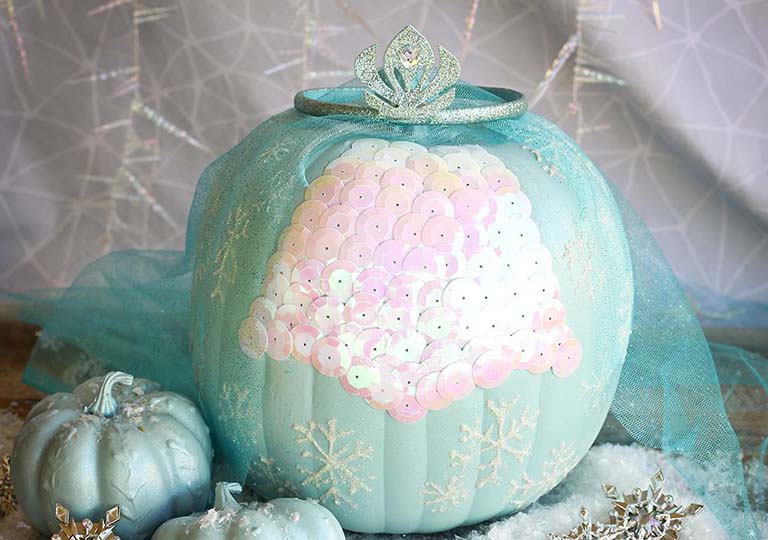
The cold never bothered this pumpkin! Spray first with Elsa blue paint and then with glitter blast paint. Use glitter glue to create snowflakes on the pumpkin and to attach sequins that make up the bodice of her dress. Then add tulle and a mini tiara to make your royal gourd ready to open up the gates for trick-or-treaters!
Disney Visa Cardmembers can redeem their Disney Rewards Dollars toward purchases to add a finishing touch like Elsa’s tiara to accompany their pumpkin creation, at Disney store and shopDisney.com.0 If you’re not yet a Cardmember, click here to learn more about the rewards and perks the Card features — which are all treat, no tricks!

