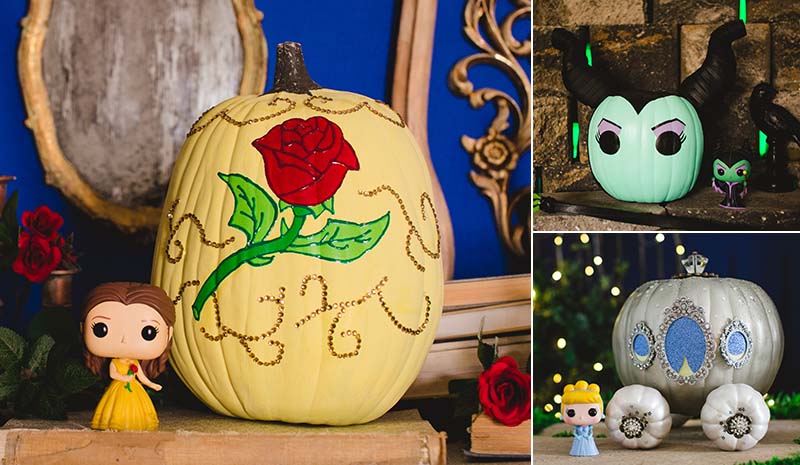
Pumpkins aren’t just for ferrying Cinderella to the ball; they’re also great for getting your kiddos into the Halloween spirit the Disney way! Best of all, everyone can join in the fun with no-carve, kid-friendly designs inspired by Cinderella’s dreamy carriage, a not-too-scary Maleficent, and, of course, the rose and Belle’s iconic gown from Beauty and the Beast. October 31st is rapidly approaching, so ditch the carving knives, grab your paintbrushes, and let’s get started with everyone’s favorite Beauty! As always, Disney® Visa® Cardmembers can redeem Disney Rewards Dollars toward DisneyStore.com purchases.1
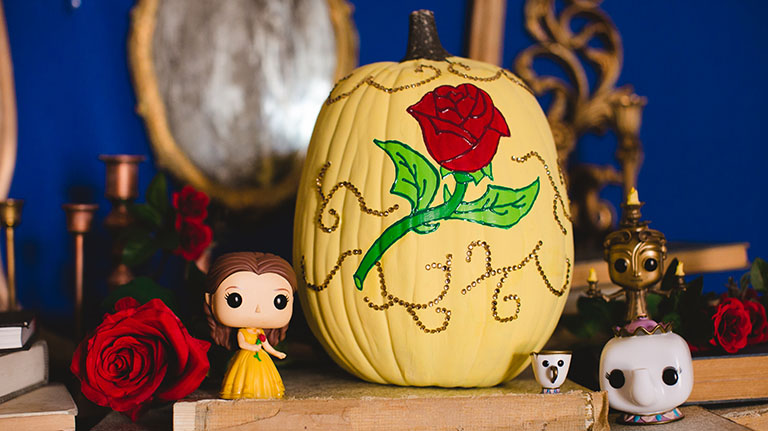
Belle of the Pumpkin Patch
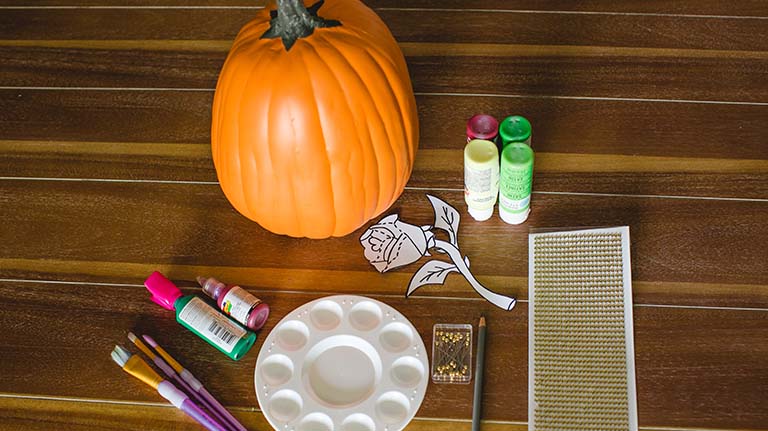
Materials needed:
- 1 medium pumpkin (to reuse next year, use artificial pumpkin)
- Acrylic paint: Dark red, light green, grass green, and pale yellow
- Dimensional paint: Dark red and dark green
- Provided rose template (click here to download and print)
- Push pins
- Pencil
- Self-adhesive gold rhinestones
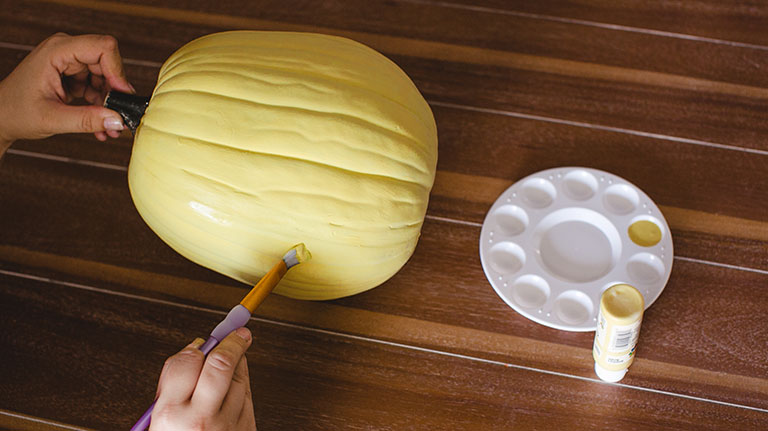
Step 1
Base coat: Paint the entire pumpkin yellow, then allow to dry.
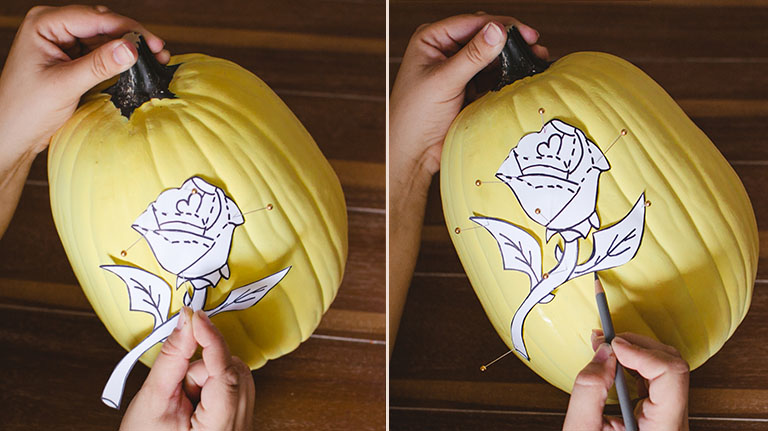
Step 2
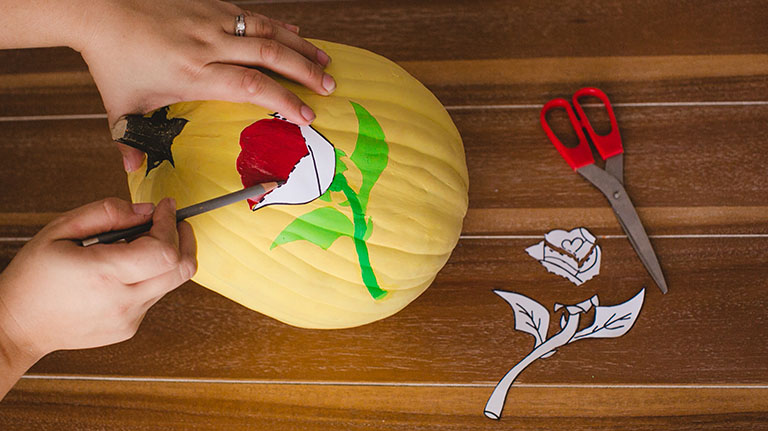
Template 1: Cut out the rose from the provided template and pin it to the pumpkin. Trace with a pencil.
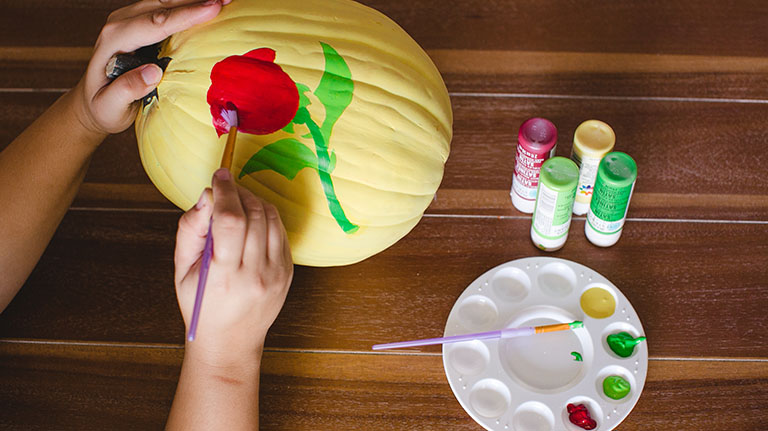
Step 3
Rose base: Paint the rose head dark red, leaves and thorns light green, and stem dark green. Allow to dry.
Step 4
Template 2: Cut the rose template along dotted lines. Trace each section into the rose head with pencil.
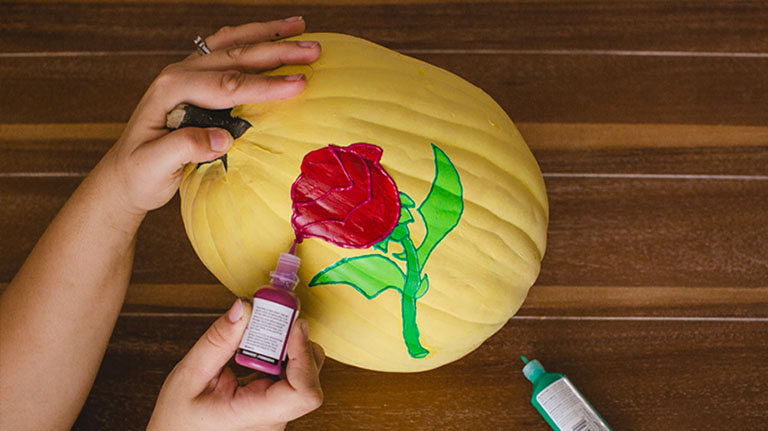
Step 5
Outline: Outline the new rose lines with dark red dimensional paint, the stem and leaves with dark green.
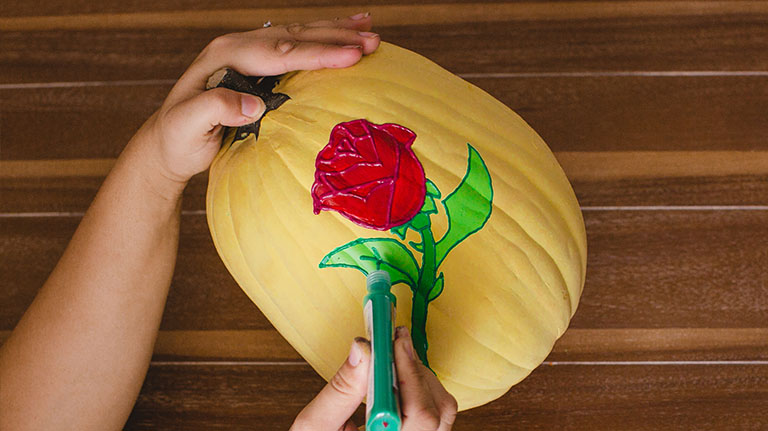
Step 6
Interior detail: Using dimensional paint, freehand the rose’s interior lines and leaf veins according to the model pumpkin.
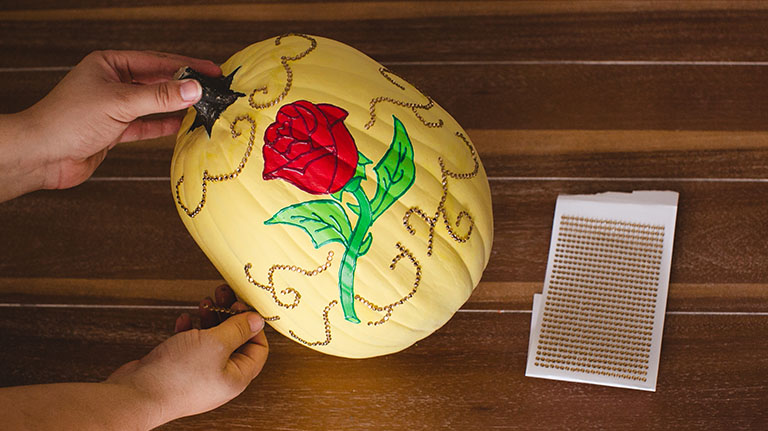
Step 7
Rhinestones: Place self-adhesive rhinestones on the pumpkin in a swirl pattern, using the model pumpkin as a guide.
Step 8
Display: Put the pumpkin on a pedestal and surround with some of your favorite Beauty and the Beast products from DisneyStore.com. Now you’re ready to show off your creation in your castle’s West Wing!

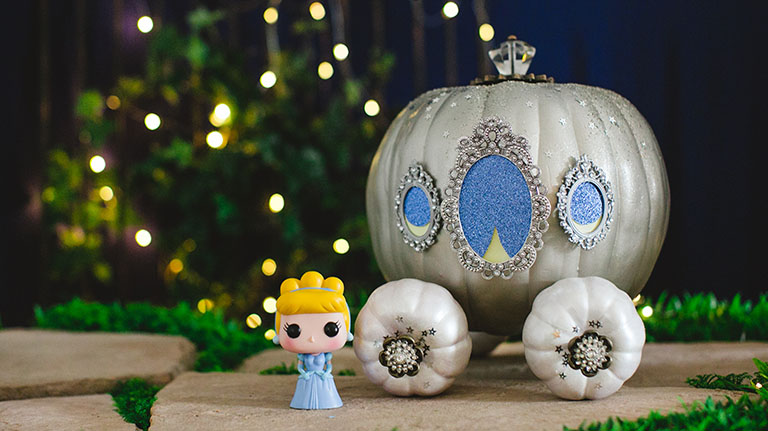
Cinderella’s Carriage
Put the “Boo” in “Bibbidi-Bobbidi-Boo”! Convert your very own unassuming gourd into a glistening carriage headed for Halloween fun (no wand required).
Materials needed:
- 1 medium pumpkin (to reuse next year, use artificial pumpkin)
- 4 small pumpkins (to reuse next year, use artificial pumpkins)
- Acrylic paint: silver, white
- Mini picture frames (optional)
- Glittery card stock (optional)
- Provided window template (click here to download)
- Silver glitter
- Decorative silver finial
- Glue
Step 1
Paint your Cinderella pumpkin silver.
Step 2
Glue mini picture frame windows and glittery card stock curtain shapes on one side. (Or you can download this template, color and affix it to the pumpkin.)
Step 3
Paint four smaller gourds white and decorate with glitter and silver accents.
Step 4
Skewer the smaller gourds to create wheels, attaching two on each side of the pumpkin.
Step 5
Dust your creation with glitter and top the whole thing off with a decorative finial for a stem. And don’t forget to redeem your Disney Rewards Dollars toward some Cinderella merchandise to place next to her carriage!1
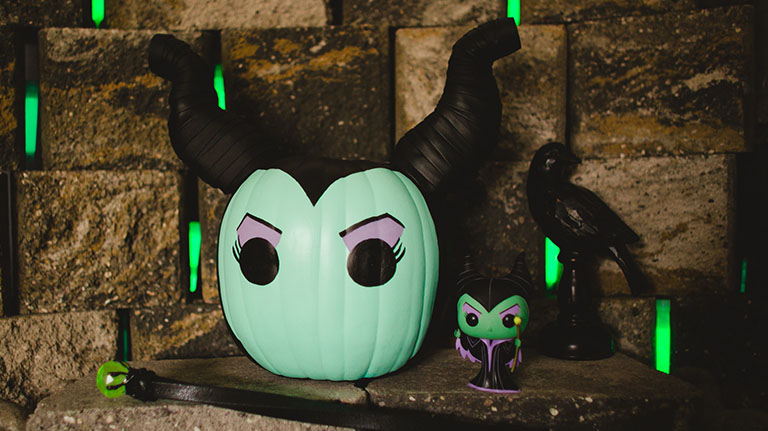
Maleficent
Every Halloween needs a villain, and this Mistress of Evil fits the bill without scaring off the neighbors. This glaring gal will be happy to stare down late-night trick-or-treaters long after your little Sleeping Beauties have gone to bed.
Materials needed:
- 1 medium pumpkin (to reuse next year, use artificial pumpkin)
- Acrylic paint: light green, lavender, black
- Provided face template (click here to download)
- Styrofoam
- Leather ribbon
- Hot glue
Step 1
Cut off the stem and paint your pumpkin green and black. Follow the above photo to create the widow’s peak with black paint.
Step 2
Paint on Maleficent’s face with black and lavender. You can download this tracing template to help you with the shapes.
Step 3
Cut styrofoam into horn shapes and wrap them in leather ribbon.
Step 4
Hot glue the horns onto the pumpkin for a sinister finishing touch. Make sure an adult is present when handling hot glue.
We hope you enjoy these no-carve Disney pumpkin painting ideas. Happy Halloween!