You’ve booked the Disney vacation, planned the outfits and now it’s time for some sparkle—starting with your nails! If you’ve been admiring your favorite Characters, now you can let some of those favorites grace your fingertips—literally. We’ve got three whimsical DIY nail art looks to help you channel some of your favorite Disney® Visa® Card designs: think shimmery fireworks, bold colors with chrome touches and retro pop art vibes—all rendered in miniature detail. So pull up a chair, grab your favorite polishes and nail tools and let your hands do the storytelling.
Once those digits are primed and polished, it’s time to use them to book your next Disney vacation (if you haven’t already). Because when your mani’s giving sparkling celebration splendor, Pixar Pal punch or Mickey Mouse magic, there’s only one thing left to do—plan the vacation! Use this DIY mani guide as your passport to parks-ready perfection, and then use your Disney Visa Card to secure special vacation financing on select Disney vacation packages.1
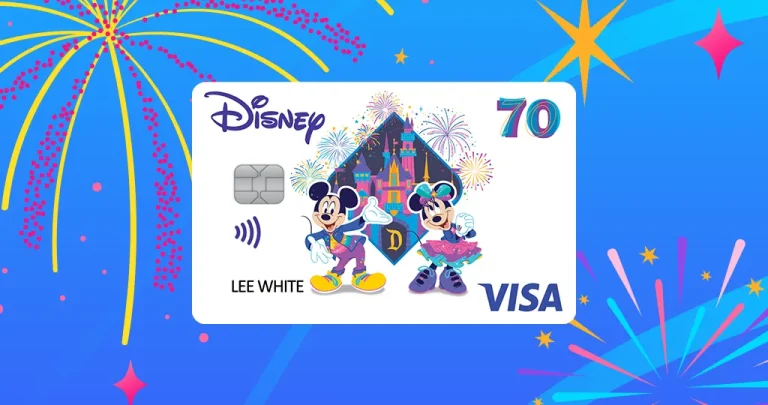
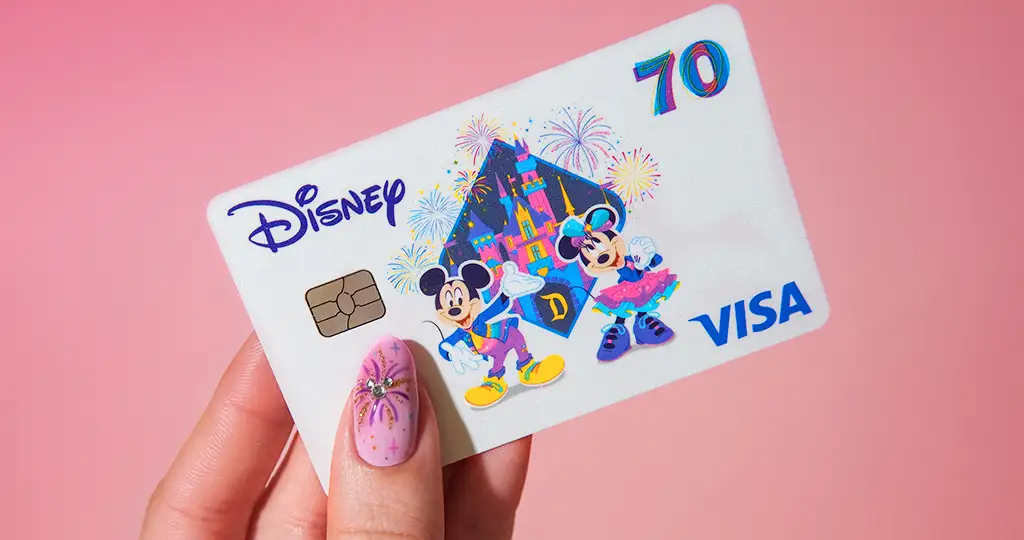
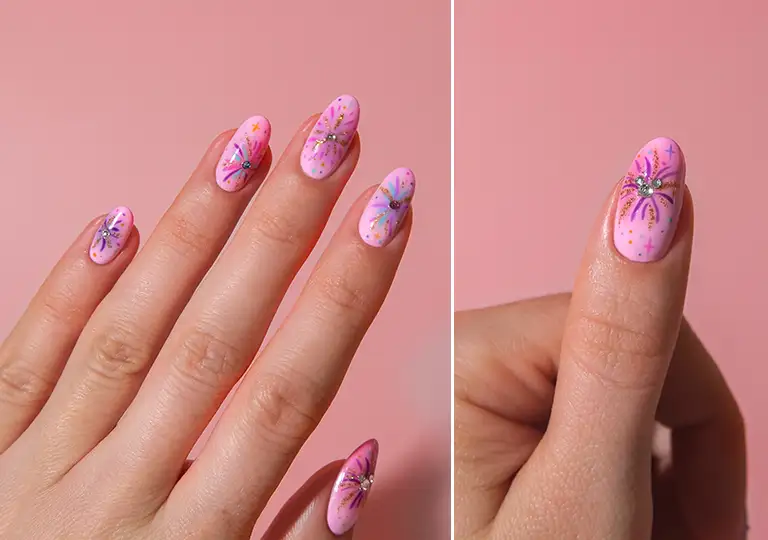
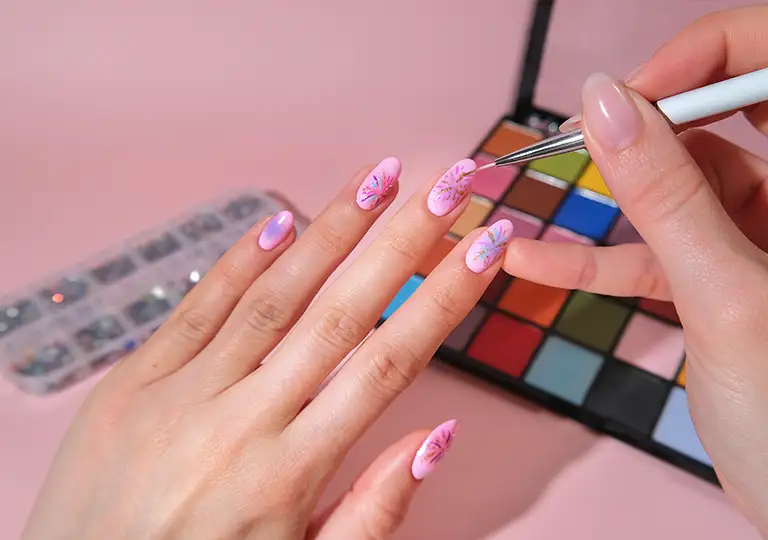
Disneyland® 70 Celebration Nails DIY
Inspired by the latest Disney Visa Card design to join the roster, the Disneyland® 70 Celebration Card lends itself to be remade into a marvelous mani! With its happy and classic motif and vibrant palette of colors, here’s everything you need to know to capture the look.
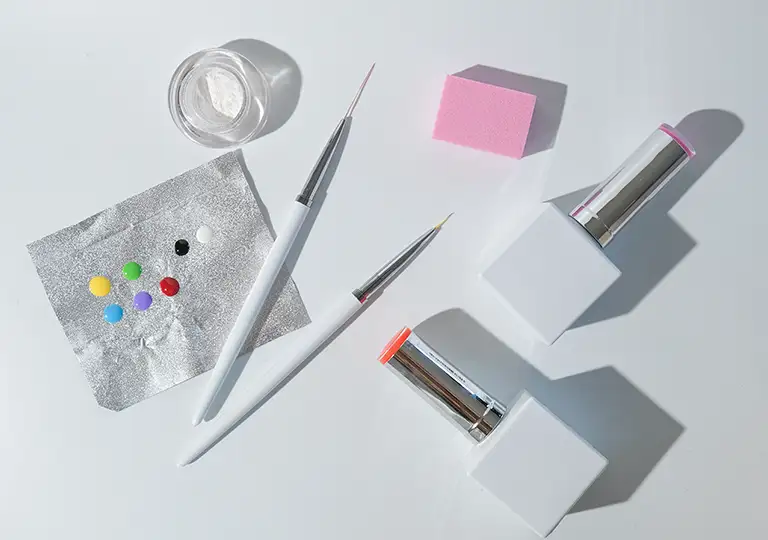
What You’ll Need
- Gel polish in the following colors/shades: yellow, yellow gold glitter, orange, pastel pink, light pink, turquoise blue and dark blue
- Eye shadow brush
- Thin nail art brush
- Pencil
- Multi-colored nail gems
- Clear “crystal” nail gems
- Powder eyeshadow palette, with jewel tones of pink, purple and blue.
- Nail dotter tool(s) OR use the back of a nail brush (to create dots)
- Gel glossy finish topcoat

Step-By-Step Instructions
-
The party starts at your fingertips! But before you pop the confetti and raise a glass, let’s get those nails prepped for the celebration. Take your nails from rough draft to polish-ready by trimming, filing, cleaning, and otherwise prepping your nails for polish.
- Paint each nail your chosen pink hue, and allow to dry before moving on to next step.
- With an eyeshadow brush or sponge, apply the jewel-toned eyeshadow powders to each nail lightly for a diffused, ‘aura’ effect. Use shades of purple, pink and blue for a layered and dynamic look. Set with clear top coat and allow to dry.
- Using a thin striper tool, apply alternating, colorful lines to create a “firework” on each nail.
- Once stripes are dry, apply multi-colored gemstones to the center point on a few fireworks for the finishing touch. Use nail glue and the tip of a pencil to secure these delicate details.
- Apply clear gemstones to create a tiny Mickey Mouse on some nails, and seal your explosive new mani with a glossy top coat.
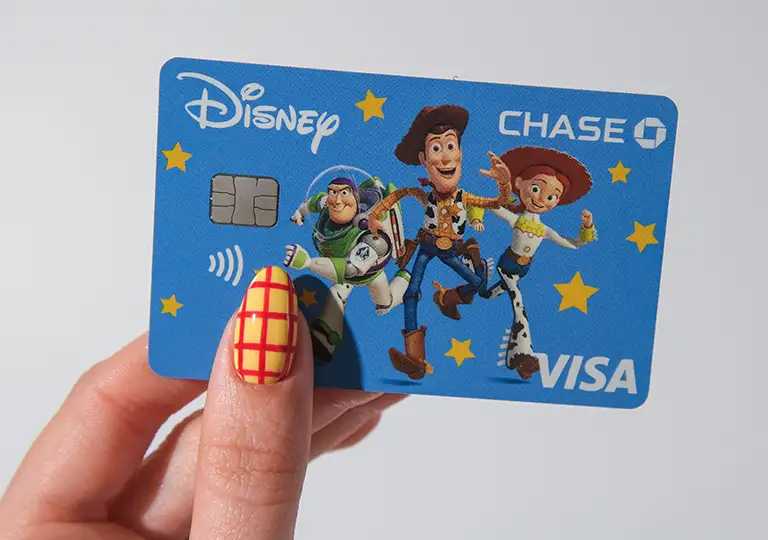
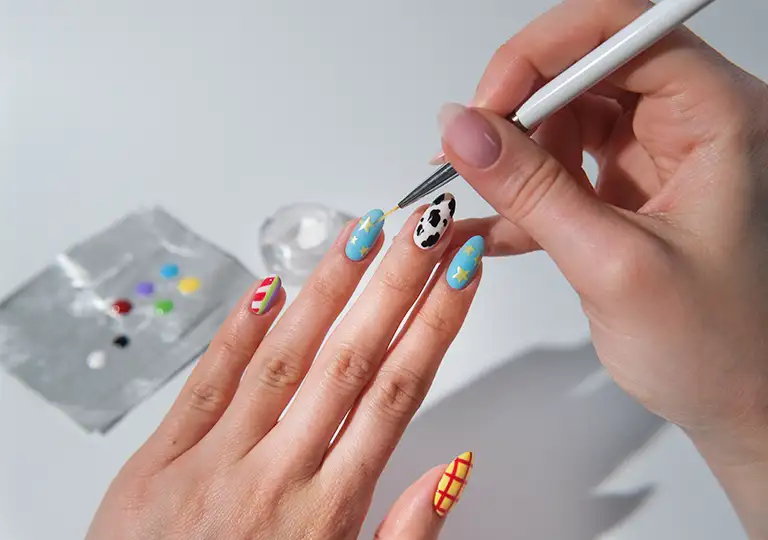
Toy Story Nails DIY
Inspired by the Disney and Pixar Toy Story Disney Visa card design as well as Andy’s beloved toys Woody, Buzz Lightyear & Jessie, this mani is made for bold hearts and big adventures. Think cow-print accents, space ranger stripes and rodeo-ready reds—all pulled straight from the iconic styles of your favorite Toy Story trio! With colors that pop and patterns that play, these nails will have you ready to ride off into the sunset (or hit the parks) in style. If you have this much fun at your fingertips, there’s only one direction to go—to infinity and beyond!
What You’ll Need
- Gel polish in the following colors/shades: blue, light yellow, golden yellow, green, red, purple, white and black
- Gel glossy finish topcoat
- Chrome powder
- Thin nail art brush
- Nail art striping brush
- Nail buffing block
Step-By-Step Instructions
- Round up those cuticles, partner! Trim, clean and shape those nails ’til they’re looking rootin’-tootin’ tidy—’cause there’s a few new polishes in town, starting with the next step.
- Apply base colors of blue, white and yellow to each nail. Allow each color to dry fully before moving on to the following design steps.
- Using a fine brush, apply thin, crosshatched red lines to the Woody-inspired yellow nail.
- Apply a cow print pattern in black polish using a fine-tipped brush to the white nail to complete the Jessie-inspired design.
- Using a striper brush, apply green, purple and red stripes to each remaining white nail, completing the motifs inspired by Buzz Lightyear.
- Paint delicate stars on each blue nail using yellow polish and make them shine with chrome powder. Then seal each nail with a glossy top coat.
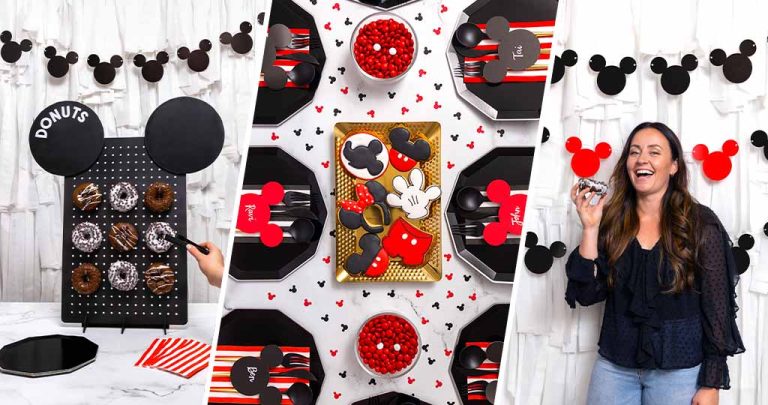
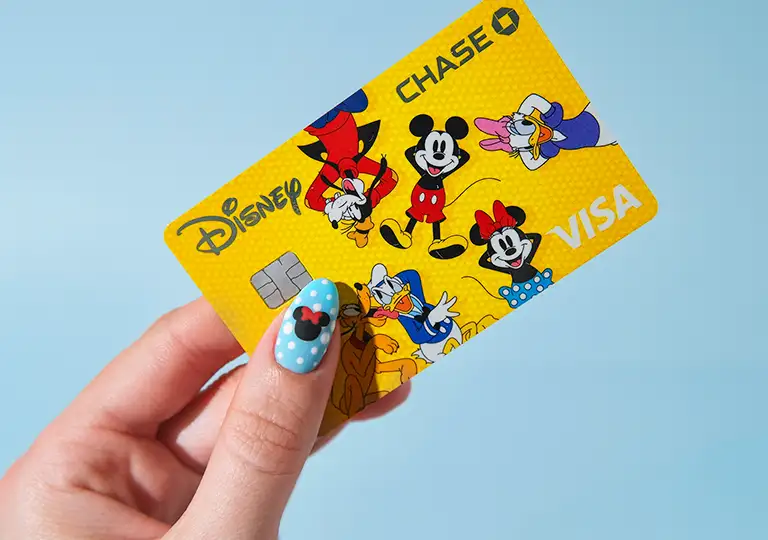
Mickey & Friends Nails DIY
We’re so excited about this nail DIY which takes playful polka dots and combines them with the kind of charm only Mickey Mouse and some of his favorite pals can bring. Oh boy! Think retro remix with a glossy finish, ‘cause this mani is colorful, cheerful and carefree. Each glimpse of these nails is sure to bring you a moment of joy—much like spotting your Mickey & Friends Design Disney Visa Card in your wallet!
What You’ll Need
- Gel polish in the following colors/shades: light blue, red, pink, white and black
- Thin nail brush
- Nail dotter tool(s) OR use the back of a nail brush (to create dots)
- Matte finish topcoat
- Gel glossy finish topcoat
Step-By-Step Instructions
-
Before we paint the town red (and blue), let’s polish up those paws, doll! Because even the boldest pop art needs a flawless base. Prep your nails by trimming, cleaning and pushing back your cuticles and taking care of any other nail prep needed to feel you’ve sufficiently tidied those fingertips before the color party starts.
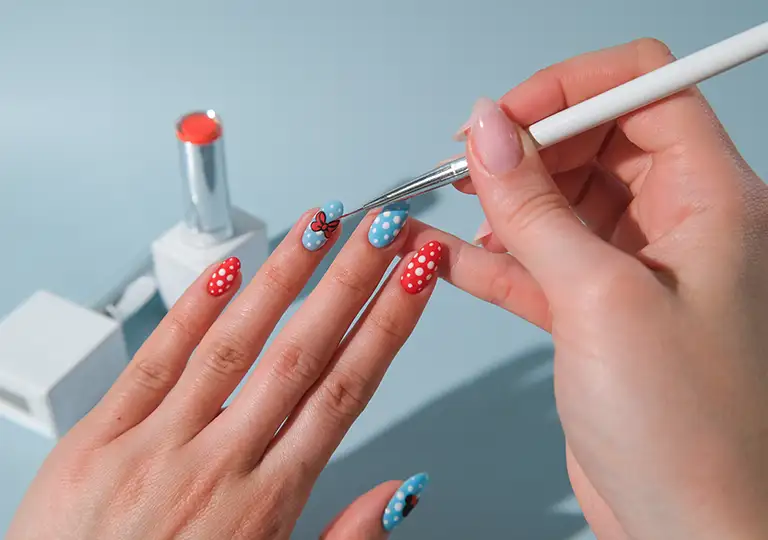
- Paint each nail the base colors of blue and red.
- Using a dotter tool or the other end of a nail brush, apply the dot pattern in varying sizes to each nail, with the largest in the center and the smallest dots outward.
- Seal with a top coat and let dry before using a thin nail brush to paint a bow design with white polish, then outline it using black.
- Paint a Minnie Mouse design on your chosen nail. Seal your finished manicure with a glossy top coat and get ready to flash these nails at every opportunity!
Now that your nails are gleaming, it’s time to turn that glow into an unforgettable adventure—by booking your next Disney getaway. Whether you’re rocking Mickey Mouse charm, Pixar flair or a burst of celebratory sparks, your mani is the ultimate accessory for your next park-perfect vacation. Don’t forget to use your Disney Visa Card to unlock special vacation financing on select Disney vacation packages.1 Your next getaway is calling—and everything you need is at your fingertips!